Showing posts sorted by relevance for query salsa time. Sort by date Show all posts

Monday, August 15, 2011

salsa-time!


First day of school...oh my, this is the longest day ever!!!  3:40 cannot come soon enough!  And, that may be all I can say right now about school, until I pick up my boys, go out for ice cream {as promised - we're easing our way off of vacation-mode}, and see how it went.  Then, I can share more.
For now, I'm trying to distract from this quiet house and share with you one of my favorite recipes for this time of year.  

homemade salsa for canning
16 c. tomatoes, peeled
2 c. green peppers
3 c. onions
8 yellow peppers (the small, banana kind)
3 T. salt
1 c. cider vinegar
4 buds garlic (buds, not cloves)
3 T. sugar
hot peppers (I like a mixture, like 3 jalapeno, 3 serrano, 1 poblano)
bunch of cilantro (add at the very end - the more, the better... I think)

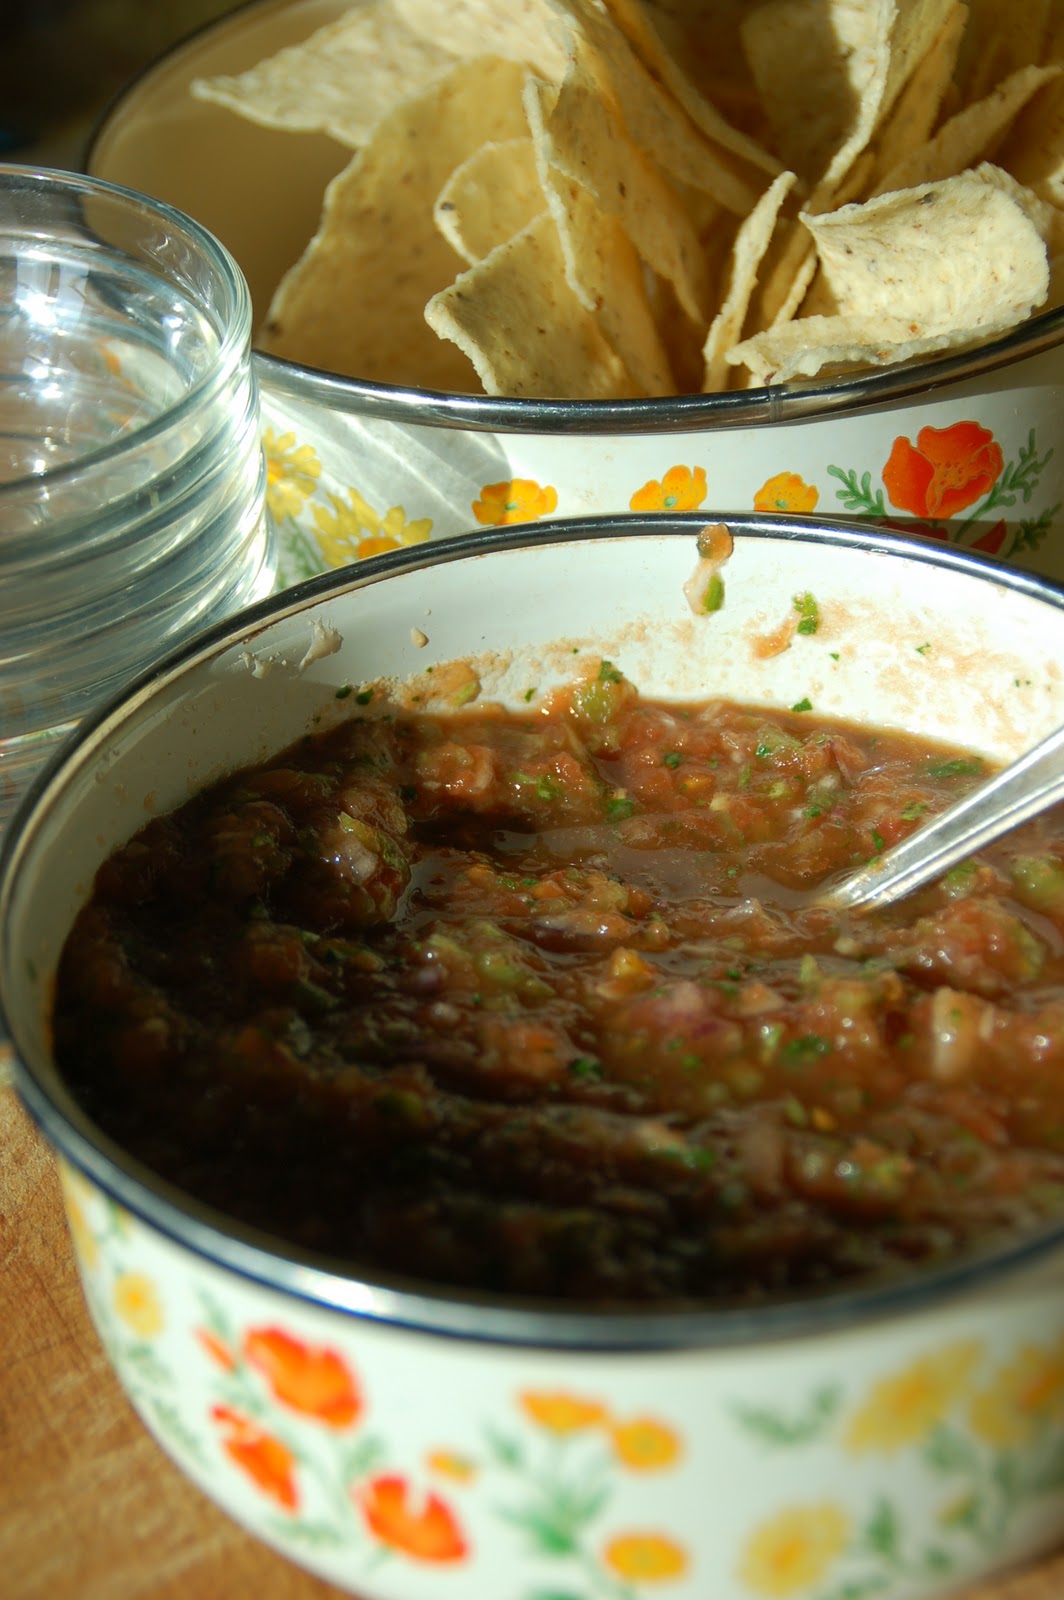
Before you proceed any further, make sure you have tortilla chips on hand...

Peel the tomatoes by placing them in boiling water, then plunging them in cold water - the skins come right off. Chop veggies, or let the food processor do the chopping. Place in a large pan. Simmer for 1 hr. (If you can this, I simmer less, like 30 min.) Break out your best zumba moves. Taste and tweak to your liking (you can add chili powder, more salt, more peppers, etc...) Don't forget to add the cilantro! Can or freeze.
To peel the tomatoes, place them in a pan of boiling water, stir until the skins begin to crack, then plunge them in ice cold water.  The skins peel right off.
 After all these years, my motto for canning is: 
"A few twinges of regret (coupled with some "why do I do these things???") equals a whole year of gratitude."


1 batch down.  3 to go... 
Oh, and I'm the kind of person that has to do the math on to see if it's worth it, so I added up what we spent at the farmer's market:
Bucket of organic tomatoes: $5
Onions: 50 cents
Green pepper: 50 cents (it was huge, so 1 was enough)
Hot peppers: $1
Yellow peppers: $1
This made 15 pints of salsa (plus close to a pint we ate making it :)
$8 for 16 pints of salsa.
That's 50 cents a jar!

It's worth it, people!
Have fun salsa-ing :)

{Because, if it weren't for the little things like canning salsa, I may have been happy to just pause our life a week ago and never get on with the year...but today has come.  So, we see THIS is the day the Lord has made, to rejoice and be glad in it.}

Wednesday, August 24, 2011

lost art of canning

We're bringing back canning today!  
So if you have littles at home, stop reading right now, go cuddle and savor your babes, 'cuz it goes too fast!  Too soon they will be in school and you will have to come up with something better to do with your time than wishing back those days, like writing about canning...
After they are in school, you may proceed :)


I don't know that I fully appreciated the legacy my mom passed down to us kids, the "fruit" of her labor...until now.  I can still see her over a pot of boiling water, peeling the skins off tomatoes to can, snapping beans or peas to freeze, shucking corn (which has to be one of the funnest phrases to say, especially if you add a twist to it, like "shukka kahn!"), or sitting down with a pairing knife, a large bowl of peaches and some simple syrup.  

I realize not all have been able to shadow their moms on this one, and I'm not saying all moms should do this.  This is the beauty of God gifting us in all different ways, and using those gifts in all different seasons. 


If you are in a season where you would like to throw some jars into a canner, but have no idea where to begin, here ya go.  
the basics.
1.  find the time.
If you have half-pints running around your house, calling you mama, save canning for another year.  I started when the older boys were 3 and 4.  We don't have tv, so I would put them to bed at 7 and spend a few nights over the canner.  Now that they are older, I do what I can while they are in school.
2.  prioritize.  
We love preserving fresh produce, but I can't do it all.  I would be spending this whole month in the kitchen if I tried to.  So, we picked out a few favorites:  freezing berries and applesauce, canning salsa and peaches.  
3.  price.
In order to not consider this a waste of time or resources, I have to make sure we're saving money.  I ask around for the best prices, checking local produce stands, talking with local farmers, looking into produce auctions.  I have gotten 2nds before on peaches, because they can be half the price of 1sts.  This year I got a bushel of local peaches for $31.  I canned 21 quarts, and we probably ate or gave away another 5 quarts.  It came to a little more than $1 per jar, which will be cherished in baked oatmeal on a cold winter's day.
4. process.
Let's say your counter looks like this.  Remember my motto:
A few twinges of regret equals a whole year of gratitude.
Take a deep breath.  
To easy-peasy peel them, place in boiling water, then quickly remove and plunge into ice-cold water.
This is the set-up I find easiest for halving peaches and removing the skins:  1 pot of ice-cold watered peaches (left), 1 bowl for skins and pits (middle), 1 pot of cold water (right) for halved/skinned peaches to go into until they are ready to be placed into jars.

When it's time to put them in jars:
.: lower the halved peaches with a fork stuck in the middle of the peach.   
.: stack them around in a circle.
.: pour in the simple syrup, leaving 1/2 inch at the top. [1 cup sugar to 3 cups water]
.: sprinkle citric acid or fruit fresh on the top peach. [1/2 teaspoon per jar]
.: tighten the lid with a ring.  [rings can be re-used, but use new lids!]
.: place sealed jars in a canner.
.: pour in enough water to come up 2 inches on the sides of the jars.  
.: put the lid on the canner, turn on the burner, and wait for the water to boil.  
When the water has boiled 16 minutes, remove the jars from the canner, tighten the lids, and turn the jars upside down to cool.
After they are cool, remove the rings, label and store.  


If you're doing salsa, here's the recipe we like.  I simmer the batch of salsa 30 minutes.  Spoon into jars, using a ladle and funnel.  Process the salsa in 2 inches of boiling water for 30 minutes.  Then, proceed as above with removing the jars.

If you are a seasoned canner, and have anything to add, please do share!
If you're a cold-feet-canner, you can do this!  And, be sure let us know how it goes...
And, if you're a mama just not able to add one more thing to your day, good for you!  Yours is a precious calling!  Enjoy these days, as full and crazy and sleepy as they may be :)

Monday, April 4, 2011

fresh homemade salsa

Our family loves us some salsa! And really, can you listen to salsa music without craving it? I don't know. I can't. 


We started canning our own (recipe found here). It has become a fun tradition on an August eve to gather our harvest and fill our kitchen with the aroma of fresh salsa.  Bag of tortilla chips on hand is a must!  Last summer we canned 40-some jars of salsa. We eat lots of black bean soup, chicken black bean soup, which both call for salsa. And, we are down to the Final Four. I am saving these for a super-easy-need-a-snack-for-a-group-quick kind of moment.

Until we have a bounty of tomatoes, we haven't given up our addiction to salsa. Here's what we've been making. I'll whirl it all in the food processor, taste, and tweak to our liking. But here's the gist...

Fresh Homemade Salsa
30 oz. can diced tomatoes OR fresh tomatoes, chopped
1/4 of an onion
1/2 of a green pepper
1-2 cloves garlic
a bunch of of cilantro (as much as you like - we like it really cilantro-ey)
jalapeno (1/2 to whole - depending on how much spice you like)
juice of 1/2 lime
salt to taste (1/2 - 1 teaspoon)

Put in food processor, pulse to chop and combine.  

Tweak to your liking.  OlĂ©!


Spring Break!!!  
We are taking off for a few days - nothing tropical or adventurous, just some time away with my boys.  Before then, Florida is coming to me tomorrow, and I can't wait to see them!  Tonight, our life group surprised me with a pre-birthday bash - complete with decorations, mirassou, gluten-free tiramisu, brownies, cookies, and minorrah candles - love you girls!

Monday, July 25, 2011

life beyond gluten

One year ago, I got the phone call that started me down this gluten-free adventure.  It was one of those moments I wasn’t sure whether to breathe a sigh of relief, or cry.  I tested positive for celiac disease, and was relieved to know why my stomach was so upset, why I was sooo tired.  But, I didn’t know the slightest about celiac disease, let alone how I would manage to cut out the 4 basic food groups of the American diet?  
You know…bread, pasta, bagels, donuts…

why kick the gluten?
Basically, my body could not break down the proteins in wheat, so every time I ate a piece of homemade whole wheat bread (that was supposed to be so good for me), it wreaked havoc on my insides.  My thyroid problems were probably caused by celiac.  A doc at the Cleveland Clinic told me 1 in 3 people who are hypothyroid have celiac!  [A ton of research has been done on the connection of the two.]

The only cure for celiac is to eliminate wheat, barley and rye from your diet, completely.   Once you try to do that, you realize gluten is in *everything*, from BBQ sauce to cold cuts to cookie sprinkles.  No wonder so many people are suffering from gluten overload.  Studies say 1 in 133 Americans have celiac, but only 5% are diagnosed.  The reason it is so difficult to diagnose is because there are over 300 possible symptoms! 

how to kick the gluten?
I am a firm believer that if you can do 3 weeks gluten-free, you can be gluten-free for life.  The first 3 weeks were the hardest:  figuring out what not to eatlearning what is okay, craving a crusty slice of bread.  But when I started to see how much better I felt, it was so worth it!  I lived most of my life in a fog, thinking everyone else was too.  I didn’t know better, until going completely GF.  I felt like I woke up for the first time in my life! 

It has been a challenge, mainly because I have kept our family’s grocery budget to $500/month, for the 5 of us.  Gluten-free food is usually double the cost of regular.  So, we have to be creative.  I try out lots of recipes.  We keep our meals simple, and rarely eat out.  But, it’s always such a treat to find a gluten-free replica that tastes just as good, if not better. 

what to do without gluten?
I just compiled a list of recipes we could do GF, and kept it at that for a few weeks, then added as I could.  It was something like:
Tuesday: curry chicken, rice, broccoli
Wednesday: stirfry, edamame
Thursday: rice and beans, chips and salsa
Friday: grilled chicken, potatoes, seasonal veggie
Saturday: pizza night!
Sunday: baked potatoes with toppings, salad
Breakfast: hard-boiled eggs, sconesbaked oatmeal, pancakes, breakfast casserole, smoothies, yogurt and berries, French toast, granola (with GF oats), bacon!!
Lunch: sandwiches on Udi’s bread, quesadillaswraps, taco salad with tortilla chips, BLT salad with GF croutons, pizzas on brown rice tortillas, mac and cheese, leftover soup from monday…

You might feel like you’re cooking all the time at first.  There’s no more “order a pizza” or “swing by a drive thru” option, because cross-contamination is fierce after you’ve been GF for awhile, and have a gluten sensitivity.  But, it is so. very. worth. it!
Just thinking back to what things were like a year ago before I knew what was wrong... Unbuckling Jude out of the car seat at the movie theatre on free-movie-Wednesdays, I remember last year, praying I could make it through the movie without having to take 3 boys with me to the bathroom because my stomach was in knots.  So often, I have thought how there’s no way we could have done this house renovation before saying goodbye to gluten. 

I’d just encourage anyone out there not to ignore the warning signs (all 300 of them...)  The risk of untreated celiac is disturbing, and why suffer from gluten sensitivity?  Just give it 3 weeks.  Buy frozen GF meals and make PBJ on Udi’s, if you have to (throw in a salad too :)  Taking care of yourself is so very important.  And, there is life beyond gluten!

Also, I know this is already weeks-worth of thoughts, but I read an interesting article in "Outside" magazine.  You can read it here.
Other GF link love:


I guess that's all for now.  I've had some little spies, who are just asking to get wrestled and then to pack some boxes with me :)

Sunday, November 14, 2010

chicken tostadas

Snapshots of our weekend.
We had some saints visit our home Friday. They watched our kids so we could escape to a meal without asking a child to use their fork and eat over their plate. And if that wasn’t enough to fill our hearts with gratitude, they raked our leaves while we were gone. Overflowing with gratitude now. 


Andy was gone all day Saturday, but returned with these vintage doorknobs, which brought such a smile to my face. It was so sweet that he remembered the store we’d seen them in 3 hours from here (but I didn’t realize what a steal they were at the time) and that he went out of his way to make it there after his meeting. These are perfect for a fun project I've been waiting to make...


Sunday was a birthday party for a sweet little 2 year old. I dusted off the ole sewing machine to make him a little bag (from a pair of Andy's old shorts :) It feels good to create. And, little boys need a bag for their treasures. Our boys fill theirs with rocks, frogs and insects (plastic ones...usually).


And what better way to end the weekend than with popcorn, story time and some “Pharoah Pharoah”? Jude singing “Let me people go. Huh, huh” is almost too much!


I started making this recipe in the summer when we grilled Victa's amazing chicken and had some leftover (which rarely happens :)  Or, last week I roasted a whole chicken and used most for enchiladas, but had some leftover.  So, I made some of these for a quick lunch the next day.  I like it because it's a great way to improvise and use what you have.  I have 2 different pictures to show this.

Chicken Tostadas
Tortillas (I use corn or rice, but flour tortillas work too)
Sauce (For these I used leftover green salsa/sour cream/cilantro mixture from the burritoes, but you can also use salsa)
Leftover chicken
Cumin and Garlic Powder (if chicken is unseasoned, like from a roast)
Cheese
Cilantro, Peppers, Tomatoes, or Green Onions for toppings
Bake tortillas at 400 for 5 minutes.  Meanwhile saute peppers and onions if using.  Toss chicken with cumin and garlic powder (for 2 cups of chicken, I use 1 t. of each).  Remove tortillas from oven and cover with sauce of choice, seasoned chicken, cheese and any other preferred vegetables (beans work too).  Bake 8-10  minutes.  Top with remaining desired ingredients.


Saturday, November 20, 2010

venison chili...just like the pioneers

Saturdays are for…
Pulling out the sleeping bags and dragging each other around in them or sliding down the stairs in them or cuddling up to watch Mr. Bean in them...


Knit. Purl. Knit. Purl.  Every possible “spare” minute  (When will I learn and start these in June?)…
Overflowing with thankfulness…


A pot of chili…

I’ll be the first to admit, I never thought I could cook with deer.  But, we were given some venison.  The thought of cooking with Bambi was just a little disturbing to me.  So I tried to think of myself as being all pioneer-like and was inspired.  I thought chili was the most incognito dish I could hide some in.  No apology needed for the substitution... It was delicious!  So, thanks to the true pioneers who shot the deer with a bow and arrow and shared their bounty with us :)

I know everyone has their own version of chili, and you can just substitute venison for the ground beef.  But, here's what I did.
Chili
1 lb. venison (or ground beef)
1 onion, chopped
3 stalks celery, chopped
1 green pepper, chopped
15 oz. dark red kidney beans
15 oz.  light red kidney beans
15 oz. chili beans
1 quart (or 30 oz.) canned tomatoes
1 pint canned salsa (or, you could use another 15 oz. tomatoes)
1 T. cumin powder (I also used 1 T. cumin seeds this time)
2 t. chili powder
bunch of chopped cilantro, because we add that to everything
Brown meat with onion, pepper, and celery.  Add cumin, chili powder, salt and pepper.  Add undrained cans of beans and tomatoes.  Simmer (atleast 20 minutes, but the longer the better).  Adjust spices to liking.  Add cilantro just before serving.  (Picture taken before this...)
Good served with tortilla chips and cheese.